
Setting Up a Cluster Server
Link multiple ARK servers so players can transfer (ASM v0.9.1)
A cluster is two or more ARK: Survival Ascended servers that share a folder on disk — players can use the in-game Travel to Another ARK obelisk option to move between maps with their character, dinos, and items intact. ASM v0.9.1 sets this up via the per-server Cluster Settings sub-tab: enable, point at a shared folder, set the same ID on every member.
Prerequisite: you need 2+ servers on the dashboard. On Linux, use one absolute cluster path that the AASM user can read and write; do not reuse a Windows drive-letter path.
Confirm You Have 2+ Servers on the Dashboard
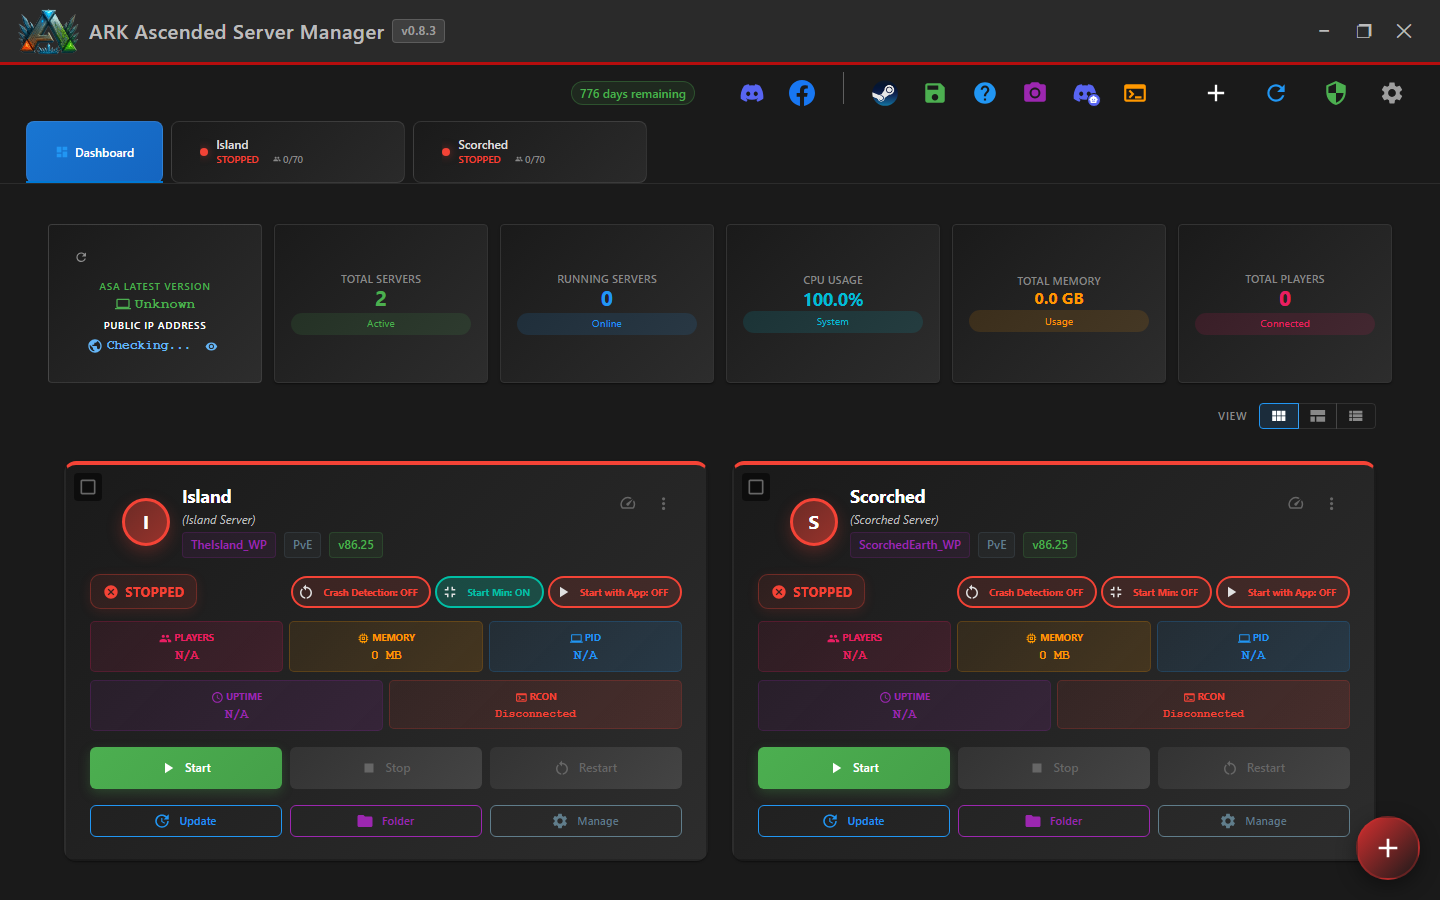
Open the Dashboard. You should see at least two server tabs in the top tab strip. The screenshot below shows a typical two-map cluster setup: an Island server and a Scorched Earth server.
Pick a Shared Cluster Directory
Before you touch ASM, decide on one folder that all cluster members will write transfer data to. This folder must be:
F:\ARK Clusters\MyCluster\ sitting alongside (not inside) each F:\Ark Servers\<name>\ folder.
Create the folder now in Windows Explorer, your Linux file manager/terminal, or on the NAS. AASM does not auto-create it.
Open Cluster Settings on the First Server
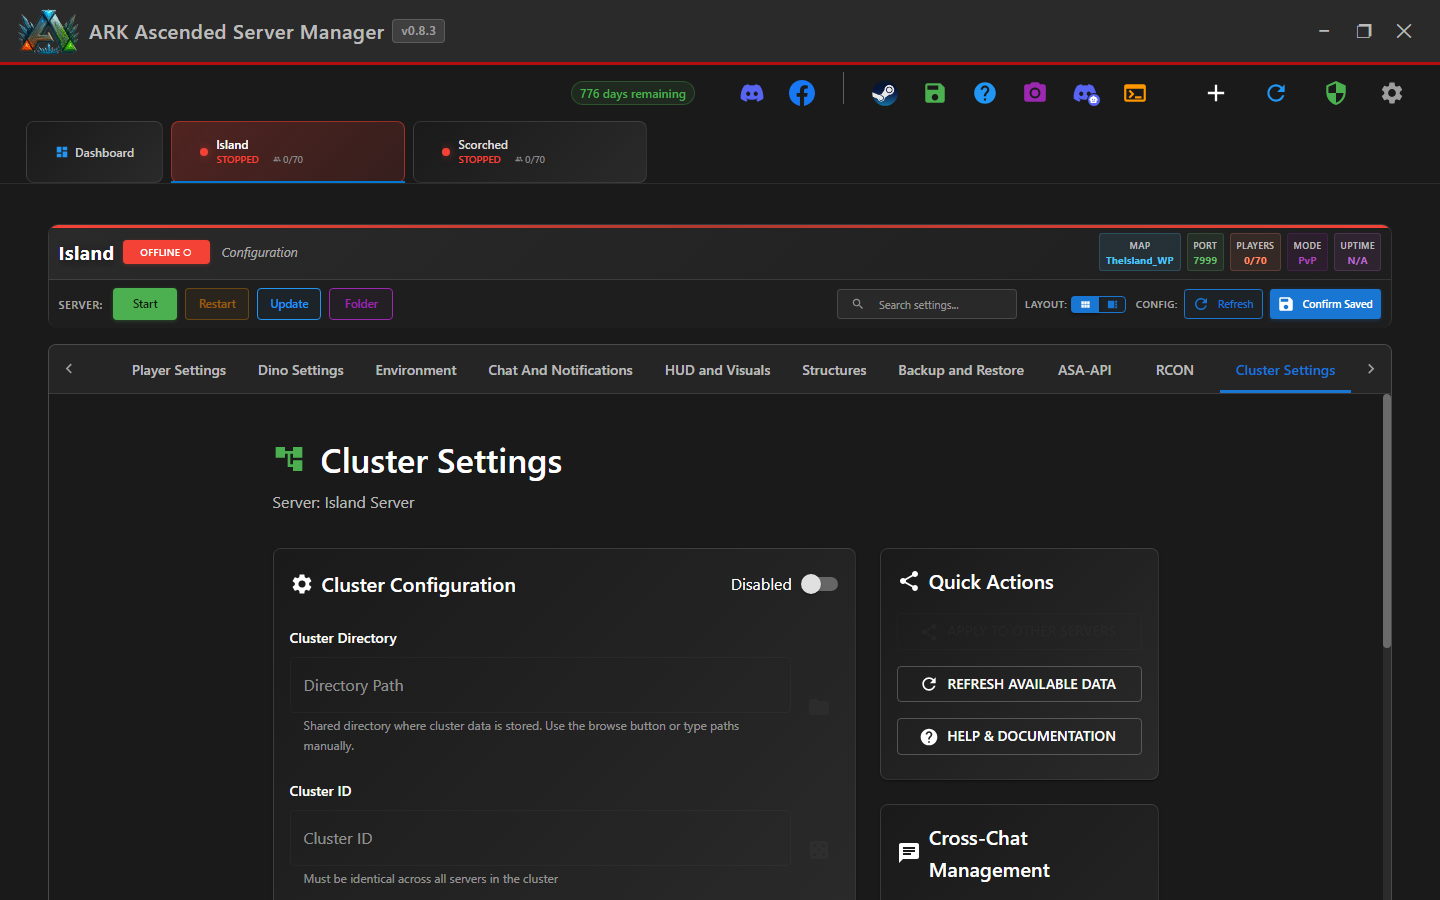
Click your first server's tab next to Dashboard, then click the Cluster Settings sub-tab in the sub-tab strip. The v0.9.1 Cluster Settings page has three main areas: the Cluster Configuration card (with an Enabled toggle), Quick Actions on the right, and Cross-Chat Management further down.
Set Cluster Directory + Cluster ID
In the Cluster Configuration card:
my-island-cluster-2026. This value must be identical on every server in the cluster. If two servers have different IDs, they won't see each other's transfers even if pointing at the same directory.
Pick a non-obvious Cluster ID. Don't use defaults like "cluster" or "ark" — if another nearby server has the same ID and shared folder access, your players' data can leak between clusters. Treat it like a password.
Enable Clustering + Save
At the top of the Cluster Configuration card, flip the Disabled toggle to Enabled (the toggle slides right and turns green). Then click Confirm Saved at the top-right of the server tab (or the Save button at the bottom of the Cluster Configuration section, depending on layout).
ASM writes the cluster settings into the server's launch arguments — specifically -clusterid=<your-id> and -ClusterDirOverride=<your-path> — which take effect on the next server start.
Repeat for Every Other Cluster Member
Open each remaining server in the cluster and repeat steps 3–5 with the identical Cluster Directory and identical Cluster ID. The only field that differs per-server is whatever's already configured (port, name, map).
Apply the same cluster directory and Cluster ID to every member, then verify each server before starting the cluster.
(Optional) Configure Transfer Restrictions
By default, players can transfer anything: themselves, dinos, items, tribute (artifacts/element). You can restrict any of these per-server via the Server Settings → Rules tab. Common choices and their Game.ini flags:
| Setting | What it blocks | Common use |
|---|---|---|
noTributeDownloads | Tribute (artifacts, element) downloads from other servers | PvE clusters — prevents farming exotic resources on easy maps and importing. |
PreventDownloadDinos | Dino transfers IN | Map-locked tame economies — each server has its own dino population. |
PreventDownloadItems | Item transfers IN | "Fresh start" servers where players keep their character but lose gear. |
PreventDownloadSurvivors | Character transfers IN | Closed clusters — new players must start a character per server. |
PreventUploadDinos / Items / Survivors | The OUT direction of each. | One-way clusters — e.g. trial server feeds into main, no return. |
CrossARKAllowForeignDinoDownloads | Inverse: allows non-native creature downloads (defaults to disallow). | If you want Aberration creatures on The Island map, etc. |
These settings are per-server, not per-cluster. You can have asymmetric rules (e.g. block uploads on a PvP map but allow downloads to it).
Restart Each Server
Clustering takes effect on next launch — the cluster args are added to the ARK process command line at startup. Stop, then Start each server (or Restart if it was running). After the restart, the in-game obelisk transfer menu on each server will show the other cluster members in its destination list.
To verify it worked, join one server in-game and walk up to an obelisk (red, green, or blue). Choose Travel to Another ARK. If clustering is wired up, the other cluster members appear in the destination list. Pick one, accept the upload of your character/items/dinos, then download on the other side.
Troubleshooting
Cluster Online!
Your servers now share a transfer namespace. Players can move between maps without losing their progress. Combine with Cross-Server Chat for a true multi-map experience.